How to Cover Up a Tattoo with Makeup: A Man’s Guide

Achieving seamless tattoo concealment with makeup involves a methodical application of color correctors, high-coverage foundations, and setting products, ensuring a natural finish that withstands diverse environments for men seeking temporary solutions.
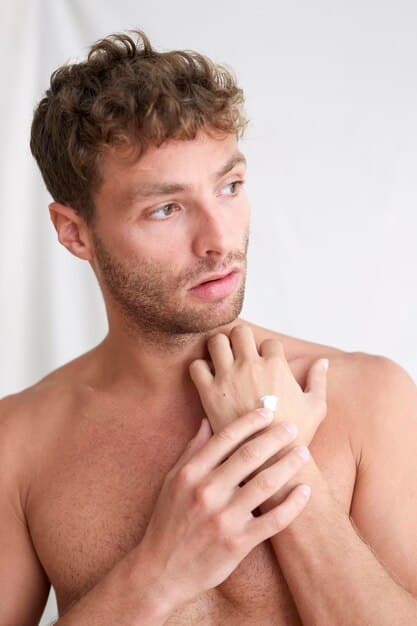
For many men, tattoos are a profound form of self-expression, narratives etched into the skin. Yet, there are occasions when these personal artworks need to take a temporary backseat, whether for professional settings, formal events, or personal preference. This is where mastering How to Cover Up a Tattoo with Makeup: A Step-by-Step Guide for Men becomes an invaluable skill. It’s not about erasing your identity, but rather about having the versatility to adapt your appearance when circumstances call for it. This guide delves into the practical, effective techniques that allow for impeccable coverage without compromising the natural look of your skin, empowering you with control over your visual presentation.
The Fundamentals: Understanding Skin Tones and Color Theory
Before diving into the application, it’s crucial to grasp the basics of skin tone and color theory. This knowledge isn’t about becoming a makeup artist; it’s about making informed choices that lead to effective, natural-looking concealment. Your skin tone, primarily determined by melanin, dictates the undertones that influence how makeup will appear on your complexion. These undertones—cool (pink, red, blue), warm (yellow, peach, golden), or neutral—are vital when selecting color correctors and foundations. Applying the wrong undertone can lead to an ashy or unnatural appearance, making the covered area stand out rather than blend in.
A common misconception is that covering a tattoo simply involves slapping on a thick layer of foundation. In reality, a successful cover-up begins with understanding the tattoo’s dominant color and applying a complementary color corrector. This is where color theory comes into play. On the color wheel, colors directly opposite each other cancel each other out. For instance, red tattoos (or areas with redness) are neutralized by green correctors, while blue or purple tones (common in shading or older tattoos) benefit from orange or peach correctors. Darker tattoos often have a strong blue or black undertone, which can be effectively counteracted with an orange or red corrector, depending on your skin tone. Ignoring this step often results in the tattoo’s original color peeking through the foundation, creating a ghostly or gray cast.
Identifying Your Skin’s Undertones
* Vein Test: Look at the veins on your wrist in natural light. If they appear blue or purple, you likely have cool undertones. If greenish, you have warm undertones. If you see a mix of both, or can’t tell, you might be neutral.
* Jewelry Test: Do silver accessories flatter your skin more than gold? Silver often complements cool undertones, while gold brings out warm tones. If both look good, you’re likely neutral.
* Sun Exposure: How does your skin react to sun? If you burn easily and then tan faintly, you might have cool undertones. If you tan easily and rarely burn, you likely have warm undertones.
Targeting Tattoo Colors with Correctors
* Green Corrector: Ideal for neutralizing red ink or any redness around the tattoo.
* Orange/Peach Corrector: Best for blue, purple, or dark spots common in black and grey tattoos. Choose peach for lighter skin tones and orange for medium to darker skin tones.
* Yellow Corrector: Can brighten dull areas, but less commonly used for direct tattoo concealment.
It’s tempting to think of makeup solely in terms of masking, but effective tattoo cover-up is more about creating an optical illusion. By neutralizing the tattoo’s color first, you’re building a neutral canvas that allows your foundation to perform optimally. This prevents the need for excessive product, which can look cakey and unnatural. Remember, less is often more when it comes to makeup application, particularly for men who typically desire a subtle, undetectable finish.
Preparation is Key: Cleansing and Priming the Skin
Just as a painter prepares their canvas, so too must you prepare your skin for makeup application. This critical preparatory phase ensures not only an even and long-lasting cover-up but also protects your skin from potential irritation. Neglecting these steps can lead to a patchy application, premature fading, or even breakouts, detracting from the overall effectiveness and aesthetic. The skin beneath and around your tattoo needs to be clean, moisturized, and primed to provide an ideal surface for the products to adhere smoothly and wear comfortably throughout the day.
The first step in any successful makeup routine is thorough cleansing. Use a gentle cleanser that removes dirt, oil, and any residual lotions without stripping the skin of its natural moisture. Lukewarm water is best, as hot water can dry out the skin, and cold water might not be as effective in dislodging impurities. After cleansing, gently pat the area dry with a clean towel; avoid harsh rubbing, especially over the tattooed skin, which can be more sensitive. A clean surface ensures makeup adheres better, preventing a greasy or slippery base that can cause products to slide off.
Once clean, moisturizing is paramount. Even if you have oily skin, hydration is necessary. A well-hydrated skin surface is plump and smooth, allowing makeup to blend seamlessly. Choose a lightweight, non-comedogenic moisturizer that absorbs quickly. Apply a small amount and gently massage it into the tattooed area and surrounding skin. Allow a few minutes for the moisturizer to fully absorb before moving to the next step. Applying makeup on damp skin can lead to streaking or an uneven finish.
Why Priming Matters
Priming creates a barrier between your skin and the makeup, offering several significant benefits:
* Enhanced Longevity: A good primer helps the makeup grip onto the skin, drastically extending its wear time, crucial for ensuring your cover-up lasts hours without needing touch-ups.
* Smoother Application: Primers often have a blurring effect, minimizing the appearance of pores and fine lines, creating a smoother canvas for the subsequent makeup layers.
* Color True Finish: Some primers can help prevent the skin’s natural oils from breaking down the makeup or altering its color over time.
For tattoo cover-up, a color-correcting primer can amplify the effect of your chosen color corrector, or a silicone-based primer can provide a very smooth, almost poreless surface, which is ideal for dense coverage. Apply a pea-sized amount of primer evenly over the tattooed area, feathering it out slightly to the surrounding skin. Let the primer set for another minute or two before proceeding to the color correction phase. This seemingly small waiting period ensures the primer has fully settled, creating an optimal base. This meticulous preparation lay the groundwork for a natural-looking, durable cover-up that remains undetectable through various activities.
The Art of Color Correction: Neutralizing the Tattoo
This is arguably the most critical step in effectively concealing a tattoo with makeup. Simply applying foundation directly over dark or vibrant ink will rarely yield a seamless result; more often, the tattoo’s original color will peer through, creating an uneven, often grayish or ashy appearance. Color correction is the process of neutralizing the tattoo’s hue using complementary colors before applying foundation. This technique allows the foundation to then create a uniform skin tone, rather than fighting against the underlying tattoo color.
The choice of color corrector is paramount and depends directly on the tattoo’s coloration. As discussed in the fundamentals, identifying the dominant color within your tattoo is crucial. For instance, if your tattoo leans blue or black, an orange or peach corrector is your best bet. Orange effectively cancels out blue tones, making them less visible. For tattoos with a strong red component, a green corrector will neutralize the redness. It’s a targeted approach, much like a painter mixing colors to achieve a desired shade.
Application Technique for Color Corrector
* Barely There Amount: Start with a very small amount of color corrector. It’s often highly pigmented, and too much will be difficult to blend and might show through your foundation.
* Targeted Application: Using a small, flat brush or a clean fingertip, apply the corrector directly onto the tattoo. Focus only on the areas where the tattoo is visible.
* Patting Motion: Gently pat the product into the skin. Avoid rubbing or dragging, which can sheer out the product and reduce its effectiveness. The goal is to deposit the color, not to blend it away entirely.
* Thin, Even Layer: Build up the coverage in thin, even layers if needed. Allow each layer to dry slightly before applying the next. The aim is to achieve a neutralized color (often a muted brownish or grayish tone), not to completely erase the tattoo with the corrector alone.
Once the color corrector is applied, allow it to set for a minute or two. This brief pause allows the product to dry down and adhere properly to the skin, preventing it from mixing with your foundation layer. You should notice a significant dulling of the tattoo’s original vibrancy. It won’t be invisible yet, but its starkness should be greatly reduced. This neutralized base is what allows your foundation to work its magic. Applying the correct shade of foundation over a properly color-corrected base will create an illusion of perfectly clear skin, making the tattoo disappear as if it were never there. Precision and patience in this step lay the foundation for a truly convincing cover-up.
Selecting and Applying High-Coverage Foundation and Concealer
Once your tattoo is color-corrected and neutralized, the next crucial step is to apply a high-coverage foundation and, if necessary, a targeted concealer. This stage is where you truly match your skin tone, creating a seamless transition from the covered area to the surrounding skin. The key is to select products that offer significant opacity while remaining flexible enough to look natural and endure throughout the day, avoiding the dreaded cakey or mask-like appearance.
Choosing the right shade of foundation is paramount. It should perfectly match your natural skin tone, not appear lighter or darker. Test shades on your jawline or the area adjacent to the tattoo, allowing them to dry down to ensure an accurate match; liquid foundations often dry a shade or two darker. Opt for a foundation specifically labeled “full coverage” or “tattoo cover-up,” as these formulations contain more concentrated pigments designed for intensive concealment. Products marketed for theatrical makeup or dermablending are also excellent choices for their superior opacity and setting properties.
Application Technique for Foundation and Concealer
* Layering is Key: Begin by applying a thin layer of your chosen high-coverage foundation directly over the color-corrected area using a flat-top brush, a makeup sponge (like a beauty blender), or a clean fingertip.
* Pat and Press: Employ a patting or pressing motion rather than swiping. This technique ensures the product is deposited effectively, providing maximum coverage without disturbing the underlying color corrector.
* Blend Outwards: Gently feather the edges of the foundation outwards, blending seamlessly into the surrounding skin. The goal is to make the transition invisible.
* Concealer for Stubborn Spots: If any part of the tattoo still peeks through after the first layer of foundation, apply a small amount of a matching, full-coverage concealer directly onto those specific spots. Again, pat and press, then blend the edges. Concealers are often more pigmented than foundations, offering an extra punch of coverage where needed.
* Build Gradually: Resist the urge to apply a thick layer all at once. Building coverage gradually, in thin layers, offers a more natural, less detectable finish and is less prone to cracking or creasing. Allow each layer to dry slightly before adding more.
Remember, the aim is to create a uniform surface that mimics the natural texture and color of your skin. Selecting oil-free and long-wear formulas can significantly improve the longevity of your cover-up, especially for active individuals. The right application technique, coupled with appropriate products, will ensure your tattoo remains a well-kept secret, even under scrutiny. Patience and a light hand are your best tools in this step, securing a flawless, natural-looking finish that remains undetectable to the keen eye.
Setting and Sealing: Ensuring Longevity and Durability
After meticulously applying color corrector, foundation, and concealer, the process isn’t complete without properly setting and sealing your work. This crucial final step ensures the makeup remains in place, is smudge-proof, water-resistant, and maintains its flawless appearance throughout the day, even under challenging conditions. Skipping this stage can lead to premature wear, transferring onto clothing, or a breakdown of the coverage, making all your previous efforts futile. The goal is to ‘lock in’ the products, creating a durable barrier against friction, moisture, and the natural oils of your skin.
Setting powder is the first line of defense. A finely milled, translucent setting powder is ideal as it won’t add extra color or weight to the already covered area. Instead, it absorbs excess oil, mattifies the skin, and creates a smooth, velvety finish that “sets” the liquid and cream products beneath it. For tattoo cover-up, consider a baking technique for enhanced durability.
Application Technique for Setting Powder and Setting Spray
* Generous Powder Application (Baking): Using a damp makeup sponge, press a substantial amount of translucent setting powder directly onto the covered area. Don’t be shy; you want a visible layer of powder.
* Allow to “Bake”: Let the powder sit on the skin for 5-10 minutes. During this time, your body heat will help the powder meld with the foundation and concealer, creating a long-lasting, creaseless finish.
* Brush Off Excess: After baking, gently dust off any excess powder with a large, fluffy brush. Ensure no visible powder residue remains. The area should now feel smooth and look matte.
* Setting Spray for Ultimate Lock: Follow up with a high-performance setting spray. Hold the bottle about 8-10 inches away from the covered area and mist generously, ensuring an even coat.
* Air Dry: Allow the setting spray to air dry completely. Do not rub or pat the area. As the spray dries, it forms a protective film over the makeup, making it more resistant to water, sweat, and transfer.
For maximum durability, especially if you anticipate exposure to sweat or water, you might consider a waterproof setting spray specifically designed for long wear. Some professional a makeup artist use a combination of powder and spray for theatrical productions, ensuring makeup stays put even under hot stage lights or during intense performances. This dual approach provides a robust seal, ensuring your covered tattoo remains undetectable. A well-set and sealed cover-up offers peace of mind, allowing you to move through your day with confidence, knowing your secret is secure.
Maintaining and Removing the Cover-Up
Once your tattoo is meticulously covered, the next steps involve understanding how to maintain the cover-up throughout the day and, eventually, how to remove it without irritating your skin. Proper maintenance ensures the longevity of your concealment, preventing smudging or fading, while careful removal safeguards your skin’s health. Neglecting either can lead to discomfort, skin issues, or a less-than-perfect appearance later.
Maintaining the cover-up requires minimal effort but consistent awareness. Avoid touching the covered area unnecessarily, as friction can cause the makeup to transfer or break down. If you need to pat away sweat or blot oil, use a gentle dabbing motion with a tissue or blotting paper, rather than swiping. Carrying a small compact of translucent powder or a blotting film can be useful for quick touch-ups throughout the day, especially if you have oily skin or are in a humid environment. Reapply powder sparingly, pressing it gently onto the area rather than rubbing.
Tips for Extending Wear
* Minimize Friction: Be mindful of clothing that might rub against the covered area. For example, if covering a forearm tattoo, opt for looser sleeves.
* Avoid Direct Water Exposure: While setting sprays offer some water resistance, prolonged exposure to water, such as swimming or intense sweating, can compromise the cover-up. If possible, avoid these activities.
* Blot, Don’t Wipe: If sweat or oil develops, gently blot with a tissue. Wiping will remove the makeup.
When the day is done, proper removal is just as important as proper application. Using harsh methods or products can irritate your skin, especially the tattooed area which might be more sensitive. Makeup designed for full-coverage and long-wear usually requires an oil-based cleanser or a dedicated makeup remover to break down its formulation effectively.
Step-by-Step Removal
* Soak a Cotton Pad: Saturate a cotton pad or soft cloth with an oil-based makeup remover (e.g., micellar water with oil, cleansing balm, or pure cleansing oil).
* Press, Don’t Rub: Gently press the saturated pad onto the covered area for 15-30 seconds. This allows the remover to dissolve the makeup.
* Wipe Gently: After pressing, gently wipe away the makeup. You might need to repeat this step with a fresh pad until all traces of makeup are gone. Avoid scrubbing vigorously, as this can tug at the skin and cause irritation.
* Cleanse and Moisturize: Once all the makeup is removed, cleanse the area with your regular gentle facial cleanser to remove any residue, then moisturize to replenish hydration. This final step soothes the skin and prepares it for its natural state.
Proper maintenance and removal ensure that your skin remains healthy and that your tattoo can be covered effectively again whenever the need arises. This holistic approach ensures not just a successful cover-up, but also continuous skin health, demonstrating respect for both your skin and your tattoo.
Common Mistakes and Troubleshooting
Even with the best intentions and products, achieving a flawless tattoo cover-up can present challenges. Understanding common pitfalls and knowing how to troubleshoot them can save time, frustration, and ensure a seamless result. Many issues arise from either product selection or application technique, which are easily corrected once identified.
One of the most frequent mistakes is using too much product, especially foundation or color corrector. While the desire for full coverage is understandable, excessive layers lead to a cakey, visibly textured appearance that looks unnatural and is prone to creasing or cracking. This is particularly noticeable in areas with movement, such as elbows or knees. The solution is to apply products in thin, buildable layers, allowing each layer to set slightly before adding more. This gradual approach provides more control over coverage and results in a smoother finish.
Other Common Issues and Solutions
* Tattoo Peeking Through:
* Problem: The tattoo’s original color (e.g., blue or black) is still visible, often appearing grayish.
* Solution: This usually means the color correction step wasn’t sufficient. Re-evaluate your color corrector choice (e.g., need a stronger orange for dark blue/black ink) or apply another thin layer of corrector before foundation. Ensure you’re patting the product in, not rubbing it.
* Makeup Transferring:
* Problem: Makeup rubs off onto clothing or other surfaces.
* Solution: The cover-up wasn’t properly set and sealed. Use a generous amount of translucent setting powder, potentially baking it onto the skin, and follow with a strong, long-wear setting spray.
* Uneven Texture/Patchiness:
* Problem: The covered area looks different in texture from the surrounding skin, or the makeup looks patchy.
* Solution: Inadequate skin preparation (cleansing, moisturizing, priming) can cause this. Ensure your skin is smooth and well-hydrated. Also, ensure you’re blending the edges of the foundation seamlessy into the periphery, feathering it out.
* Color Mismatch:
* Problem: The covered area appears noticeably lighter, darker, or a different tone than the rest of your skin.
* Solution: Your foundation or concealer shade isn’t a perfect match. Test shades in natural light on the area adjacent to the tattoo, and allow them to dry fully before making a final decision. Remember undertones are critical here.
* Makeup Creasing/Cracking:
* Problem: Fine lines or cracks appear in the makeup, especially in areas of movement.
* Solution: Too much product, especially without proper setting, or insufficient skin hydration. Ensure thin layers, proper setting with powder (especially baking), and that your skin is well moisturized beforehand.
Troubleshooting these issues often involves re-examining the previous steps in your routine. Patience and practice are your best allies. With each attempt, you’ll gain a deeper understanding of your skin’s needs and how different products interact, eventually mastering the art of discreet and effective tattoo concealment. Remember, the goal is natural invisibility, not a thick mask.
Long-Term Considerations and Alternatives
While makeup offers a fantastic temporary solution for covering tattoos, it’s also prudent to consider the broader context of tattoo concealment, including its long-term implications and alternative methods. Relying solely on makeup for extended periods or very frequently might not always be the most practical or skin-friendly approach. Understanding other options can provide a more comprehensive strategy for managing visible tattoos.
One key long-term consideration is skin health. Consistent, heavy makeup use, especially if not removed properly, can potentially lead to clogged pores, breakouts, or irritation, particularly for sensitive skin types. While modern makeup formulations are increasingly breathable, daily application on large areas might still be taxing. It’s essential to listen to your skin and give it breaks from makeup when possible, allowing it to breathe and rejuvenate overnight. Always prioritize proper cleansing and moisturizing to mitigate any potential adverse effects.
Alternative Tattoo Management Strategies
* Clothing and Accessories: The simplest and often most comfortable alternative is strategic clothing. Long-sleeved shirts, higher collars, or even accessories like watches, bracelets, or scarves can effectively cover tattoos without any makeup. This is ideal for daily wear or situations where full concealment isn’t strictly necessary but discretion is desired.
* Temporary Tattoo Sleeves/Covers: For those who need to cover arm or leg tattoos frequently for specific events (e.g., job interviews, formal ceremonies), specialized temporary sleeves or covers exist. These are typically made of skin-toned fabric designed to blend in and offer an immediate physical barrier. While not as seamless as perfect makeup, they offer quick, consistent coverage.
* Permanent Removal (Laser Treatment): For individuals who no longer wish to have a certain tattoo, permanent laser removal is an effective, albeit costly and time-consuming, option. It involves breaking down the ink particles in the skin, which are then absorbed by the body. Multiple sessions are required, and effectiveness varies depending on ink color, skin type, and tattoo age. This is a significant decision requiring professional consultation.
* Tattoo Blending/Lightening (for future cover-ups): Sometimes, instead of full removal, tattoos can be lightened through laser sessions. This doesn’t make them disappear entirely but fades them enough to make makeup cover-up significantly easier and less product-heavy. This can be a good middle-ground for very dark or vibrant tattoos that are challenging to hide.
* Tattoo Modification/Cover-Up Art: Instead of hiding, some choose to transform. A skilled tattoo artist can often rework an existing tattoo into a new design, sometimes incorporating new elements or colors to mask the original. This is a creative permanent solution for changing one’s relationship with a tattoo.
Ultimately, the choice of how to manage a tattoo depends on individual needs, the frequency of concealment required, and personal preference. Makeup remains a highly versatile and immediate option, but being aware of other solutions empowers you to make informed decisions about your body art and its presentation in various facets of life. The long-term strategy often involves a combination of methods, adapting to different situations while always prioritizing both effectiveness and the health of your skin.
| Key Step | Brief Description |
|---|---|
| 🧼 Skin Prep | Cleanse, moisturize, and prime skin for an even, long-lasting base. |
| 🎨 Color Correct | Neutralize tattoo ink with a complementary color corrector (e.g., orange for blue/black). |
| 🧴 Full Coverage | Apply high-coverage foundation and concealer in thin, patting layers. |
| 🔒 Set & Seal | Use translucent powder (bake) and setting spray for smudge-proof durability. |
Frequently Asked Questions About Tattoo Cover-Up
With proper preparation, setting, and minimal friction, a well-applied makeup tattoo cover-up can last anywhere from 8 to 12 hours. High-quality, long-wear products and a robust setting spray significantly extend its durability, even through light activity or humidity. Avoid prolonged water exposure for best results.
Without proper setting, makeup can transfer. However, by thoroughly setting the cover-up with a generous amount of translucent powder and a strong setting spray, the risk of transfer is significantly minimized. Opt for clothing that doesn’t rub tightly against the covered area for added security.
While some specialized products and setting sprays offer water resistance, makeup tattoo cover-up is generally not designed to withstand swimming or showering. Prolonged exposure to water will likely break down the products, causing the tattoo to become visible. It’s best to avoid these activities.
Yes, makeup cover-up techniques can be adapted for nearly all tattoo colors and skin tones. The key is in selecting the correct color corrector that neutralizes the tattoo’s dominant hue, followed by a foundation that perfectly matches your specific skin tone and undertone for seamless blending.
Look for high-pigment, full-coverage products like theatrical or dermablend foundations. Specific brands often have dedicated tattoo cover-up kits. Don’t forget color correctors (orange/peach, green), a good primer, translucent setting powder, and a strong setting spray. Brands known for their longevity and coverage are often preferred.
Conclusion
Mastering the art of tattoo concealment with makeup provides modern men with an empowering tool for versatility, allowing personal expression to adapt to various professional, social, or personal contexts. This detailed step-by-step guide, from understanding color theory and meticulous skin preparation to precise product application, layering, and robust setting, offers a comprehensive pathway to achieving a flawless, undetectable cover-up. By avoiding common pitfalls and embracing the nuances of each stage, individuals can ensure their temporary transformation is both seamless and durable. Remember, this skill is about control and flexibility, not about erasing one’s identity. Ultimately, knowing you have the option to reveal or conceal, with confidence and expertise, adds another dimension to personal style and visual presentation.


")


