Men’s Makeup for Beginners: Cover Acne Scars & Redness Easily

Achieving an even skin tone by addressing acne scars and redness is attainable for men using a few simple makeup techniques and products, offering enhanced confidence and a polished appearance without altering masculinity.
Exploring the world of makeup might seem daunting for men, but for those looking to effectively address common skin concerns like acne scars and redness, it’s a practical and straightforward solution. This guide on men’s makeup for beginners: a simple guide to covering acne scars and redness offers an accessible pathway to achieving a more even and confident complexion, without compromising your natural look or feeling overly made-up. It’s about enhancing your natural appearance, not masking it.
Understanding your skin: Acne scars and redness
Embarking on the journey of male grooming, specifically addressing skin concerns with makeup, necessitates a fundamental understanding of what you’re aiming to correct. Acne scars and redness are common issues, each requiring a slightly different approach to concealment. Redness, often a sign of inflammation, irritation, or conditions like rosacea, tends to be more diffuse across the skin. Acne scars, on the other hand, can vary from subtle discoloration (post-inflammatory hyperpigmentation or erythema) to more textural indentations like ice pick or boxcar scars.
Identifying the specific type of blemish you’re dealing with is the first crucial step. Is it a fresh, inflamed red spot, or an older, brown-ish scar? This distinction will guide your product selection and application technique, ensuring the most natural and effective coverage. Many men experience both, and understanding how to layer products for comprehensive correction is key. Consider observing your skin in different lighting conditions to truly understand the extent and nature of your concerns.
The science behind skin concerns
When we talk about redness, we’re often referring to increased blood flow to an area of skin, sometimes due to a broken capillary or an active inflammatory response. Concealers with green undertones are particularly effective here because green is directly opposite red on the color wheel, thus neutralizing the color visually. Acne scars, especially the hyperpigmented ones, are essentially areas where the skin has produced too much melanin in response to inflammation. For these, a peachy or orange-toned color corrector can counteract the dark, purplish hues.
* Redness: Can stem from active acne, sun exposure, sensitive skin reactions, or chronic conditions like rosacea. It generally appears as an overall flushed look or localized inflamed spots.
* Hyperpigmentation: Dark spots left after acne heals, ranging from light brown to purplish-black, caused by excess melanin production.
* Textural scars: Indented or raised areas resulting from severe acne, often requiring more advanced techniques or dermatological treatments in addition to makeup for full concealment.
Many men initially hesitate to use makeup, associating it with heavy, unnatural looks. However, the goal in addressing these concerns for men is almost always about achieving a natural, “no-makeup” look that simply enhances the skin’s natural appearance. This involves using minimal product and blending meticulously. It’s about looking like you have naturally great skin, not like you’re wearing makeup.
Concluding this section, recognize that your skin is unique. What works for one person might require slight adjustment for another. Taking the time to understand your specific acne scars and redness will lay the groundwork for a successful and natural makeup routine. This foundational knowledge empowers you to select the right tools and techniques tailored to your individual needs, setting you up for success in your grooming journey.
Essential tools and products for beginners
Venturing into the world of male cosmetics, especially for targeting specific issues like acne scars and redness, doesn’t require an arsenal of products. For beginners, the focus should be on a few high-quality, targeted items that deliver maximum impact with minimal fuss. Simplicity and effectiveness are paramount. You want products that seamlessly integrate into your routine and provide a natural, undetectable finish.
Concealer: your primary weapon
The most vital product for covering individual spots or small areas of redness is a concealer. Its creamy texture and concentrated pigment make it ideal for pinpointing imperfections.
* Picking the right shade: This is critical. Opt for a concealer that precisely matches your skin tone. Test it on your jawline in natural light. It should disappear into your skin without leaving a contrasting patch. Many brands offer a range of undertones, so identify if you have warm (yellow/gold), cool (pink/red), or neutral undertones.
* Formulation: For acne, a non-comedogenic (won’t clog pores) and oil-free formula is best. Look for options labeled “full coverage” but designed to be buildable, as you might need more for darker scars. Stick or liquid concealers are generally easiest for beginners to apply.
Color corrector: the neutralizer
For significant redness or very dark scars, a color corrector used underneath your concealer can achieve superior neutralization.
* Green corrector: Ideal for pronounced redness (active breakouts, rosacea). A tiny dab neutralizes the red, allowing your concealer to work more efficiently.
* Peach/Orange corrector: Designed for very dark, purplish, or bluish acne scars/hyperpigmentation on medium to dark skin tones. It counteracts the deeper hues.
Remember, color correctors are potent. Use them sparingly, only where needed, and blend well before applying anything else. They are meant to be a thin layer, not full coverage on their own.
Lightweight foundation or tinted moisturizer: evening out the tone
While concealer targets specific spots, a sheer foundation or tinted moisturizer can unify your overall skin tone, especially if you have widespread redness or numerous smaller scars.
* Tinted moisturizer: Offers minimal coverage, ideal for a very natural look and hydration. Perfect for evening out minor redness.
* BB cream (blemish balm) or CC cream (color correcting cream): Provides slightly more coverage than a tinted moisturizer while offering skincare benefits like SPF. Good for moderate redness or minor discoloration.
* Sheer foundation: For more significant, but still diffused, redness or scarring, a sheer to medium coverage liquid foundation can provide a smooth canvas without looking heavy.
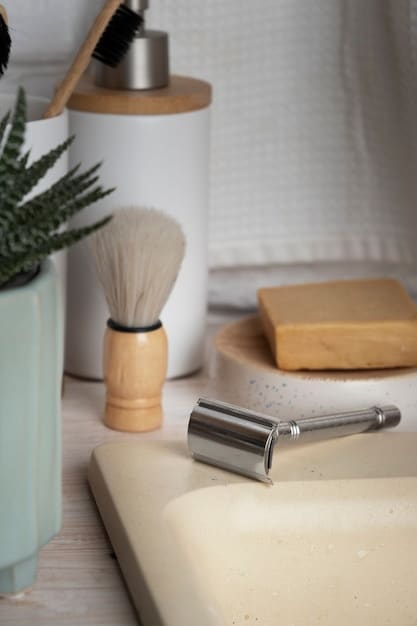
Application tools: fingers, sponges, or brushes
While fingers can work in a pinch due to their warmth helping to blend, dedicated tools offer more precision and a more seamless finish.
* Fingers: Use the warmth of your clean ring finger to dab and blend concealer for a very natural finish, especially for small spots.
* Damp beauty sponge: Excellent for blending liquid products (concealer, foundation, tinted moisturizer) seamlessly into the skin, achieving a natural, airbrushed look. Pat, don’t rub.
* Small concealer brush: Provides pinpoint accuracy for applying product directly onto scars or blemishes before blending.
It’s about finding what feels most comfortable and delivers the results you desire. Starting simple with just a good concealer and perhaps a damp sponge is a fantastic entry point. The key is to start small, build your collection gradually, and focus on products that enhance your natural appearance, ensuring a confident and polished look without any obvious signs of makeup.
Preparing your skin: The canvas for perfection
Just as an artist prepares their canvas, so too must you prepare your skin before applying any makeup. Proper skin preparation isn’t just about hygiene; it’s about creating an optimal surface for makeup application, ensuring longevity, smooth blending, and a natural finish. Rushing this step can lead to patchy coverage, exacerbated dryness or oiliness, and a less convincing end result.
Cleanse: the fresh start
A clean face is fundamental. Throughout the day or night, your skin accumulates dirt, oil, and environmental pollutants. Using a gentle cleanser removes these impurities, preventing clogged pores and providing a clean slate for products.
* Wash your face with a mild, pH-balanced cleanser designed for your skin type (e.g., foaming for oily, creamy for dry).
* Use lukewarm water, as hot water can strip natural oils.
* Pat your skin dry with a clean towel; avoid harsh rubbing.
This initial step also helps to reduce surface redness if your skin is irritated, calming it before you even reach for makeup. It’s part of a healthy skincare routine that benefits your skin whether you wear makeup or not.
Moisturize: hydrating for harmony
Even if you have oily skin, moisturizing is crucial. Hydrated skin provides a smoother, more supple surface for makeup to adhere to, preventing it from settling into fine lines or dry patches. A good moisturizer also acts as a barrier, protecting your skin.
* Choose a lightweight, non-comedogenic moisturizer suitable for your skin type. If you have acne-prone skin, look for formulations labeled “oil-free” or “gel-based.”
* Apply a thin, even layer across your entire face, including the neck.
* Allow the moisturizer a few minutes to fully absorb into your skin before moving to the next step. This prevents products from pilling or looking streaky.
For daytime, consider a moisturizer with broad-spectrum SPF. This not only protects your skin from sun damage, which can worsen redness and hyperpigmentation, but also simplifies your routine by combining two steps into one.
Prime (optional but recommended): locking it in
A primer creates a smooth, even base for makeup application, helping it last longer, reducing the appearance of pores, and even addressing specific concerns like excess oil or pronounced redness.
* Silicone-based primers: Great for blurring pores and creating a velvety smooth texture.
* Water-based primers: More lightweight, suitable for most skin types, and less likely to feel heavy.
* Color-correcting primers: Available in green (for redness) or peach (for sallowness/darkness), these can offer a subtle first layer of color correction before concealer.
Apply a pea-sized amount of primer to areas where you’ll be applying makeup or where you typically experience oiliness or large pores. While optional for beginners, a good primer can significantly enhance the finish and longevity of your makeup, making it a worthwhile addition as you become more comfortable with your routine.
This meticulous preparation ensures that the makeup you apply sits beautifully on your skin, looking natural and undetectable. It’s the secret to achieving that “your skin, but better” effect, laying a solid foundation for flawless coverage of acne scars and redness.
Step-by-step application: concealing and blending
Once your skin is prepped, it’s time for the actual application – the step where acne scars and redness effectively vanish. The key here is precision, light layers, and thorough blending to ensure the makeup looks like a seamless part of your skin, rather than sitting on top of it. Patience and a light hand are your best friends in this process.
Step 1: Color correction (if needed)
If you have prominent redness or very dark hyperpigmentation, start with a targeted color corrector.
* For redness: Dip a clean, small brush (or your ring finger) into a tiny amount of green color corrector. Dab it *only* onto the red area. Do not spread it widely.
* For dark spots: Use a peach or orange corrector, applied precisely to the center of the dark scar.
* Blend lightly: Gently pat the edges of the corrector with your finger or a sponge to blend the color into the surrounding skin, ensuring it’s a thin, almost translucent layer. Allow it a few seconds to set.
The idea is to neutralize the unwanted color, not to cover it completely with the corrector itself. This first thin layer allows your skin-toned concealer to work more effectively.

Step 2: Concealing the blemishes
This is where the magic happens. Your chosen skin-toned concealer will camouflage the pre-corrected spots and any other minor imperfections.
* Dot, don’t swipe: Apply a tiny dot of concealer directly onto the center of the scar or red spot. For larger areas of redness, apply small dots and then gently pat and diffuse.
* Blend outwards: Using your ring finger (its warmth helps blend), a small concealer brush, or a damp beauty sponge, gently pat and tap the concealer outwards, blending the edges seamlessly into your surrounding skin. Avoid rubbing, as this can lift the product and negate coverage.
* Layer lightly: If the blemish is still visible, apply another tiny dot and repeat the patting motion. Building up thin layers is always better than applying one thick layer, which tends to look cakey and obvious.
The goal is for the concealer to disappear into your skin, making the blemish undetectable. Take your time, step back from the mirror, and check your work in different lighting.
Step 3: Evening out the complexion (if needed)
If you have widespread redness or numerous small blemishes, a tinted moisturizer, BB cream, or sheer foundation can create an even canvas.
* Apply strategically: Dispense a small amount onto your fingertips or the back of your hand. Start by applying it to the center of your face (nose, forehead, cheeks), where redness and uneven tone are often most prominent.
* Blend outwards: Using your fingers, a damp sponge, or a foundation brush, blend the product outwards towards your hairline and jawline. Ensure no harsh lines are visible, especially around the jaw and neck.
* Less is more: For a natural look, use the bare minimum needed to even out your skin tone. You want your natural skin to show through where possible.
Step 4: Setting for longevity (optional but recommended)
To ensure your makeup stays put all day and doesn’t transfer, a light dusting of translucent setting powder can be beneficial, especially for oily skin types.
* Translucent powder: Using a fluffy brush or a powder puff, lightly press (don’t sweep) a small amount of translucent powder over the areas you’ve concealed or applied foundation. Focus on areas prone to shine (T-zone).
* Matte finish: This step helps to set the products, reduce shine, and prolong wear, preventing makeup from settling into lines or looking greasy.
This detailed application process, emphasizing light layers and meticulous blending, is crucial for achieving a natural, confident look. With practice, these steps will become quick and intuitive, allowing you to effectively manage your skin concerns with subtlety and precision.
Common pitfalls and how to avoid them
Navigating the world of men’s makeup, especially for beginners, comes with its own set of challenges. Making a few common mistakes can quickly turn a subtle enhancement into an obvious giveaway. Understanding these pitfalls and learning how to avoid them is just as important as mastering the application techniques itself. The goal is to appear as if you have naturally clear skin, not like you’re wearing makeup.
Pitfall 1: Wrong shade choice
One of the most glaring mistakes is using a concealer or foundation that doesn’t perfectly match your skin tone. This results in visible patches, lines, or an overall “mask-like” appearance.
* Solution: Always test products on your jawline or neck, not your hand, in natural daylight. If it disappears, it’s the right shade. Don’t be afraid to ask for samples, particularly if your skin tone changes seasonally due to sun exposure. Consider having two shades if your skin tone varies significantly.
Pitfall 2: Too much product
Applying too much concealer or foundation is a common beginner error. This leads to a heavy, cakey, or unnatural look, and makeup settling into fine lines or emphasizing texture.
* Solution: Start with a tiny amount—a pinhead size for concealer, a pea size for tinted moisturizer. Build up coverage by applying thin layers. Remember, you can always add more, but it’s harder to remove excess without disturbing your whole base. The goal is to cover the blemish, not to paint your whole face.
Pitfall 3: Improper blending
Poor blending leaves harsh lines, unblended edges, or visible patches of makeup. This is particularly noticeable around the jawline, hairline, and nose.
* Solution: Take your time. Whether using fingers, a sponge, or a brush, gently pat and tap the product into the skin, focusing on diffusing the edges. Blend out to the natural edges of your face, ensuring there’s no visible line where makeup stops. Good lighting is critical for seeing these nuances.
Pitfall 4: Neglecting skin prep
Skipping cleansing, moisturizing, or priming can cause makeup to cling to dry patches, look flaky, or slide off quickly.
* Solution: Commit to a consistent skin preparation routine. Cleanse thoroughly, moisturize, and allow products to absorb. If you have oily skin, a mattifying primer can make a significant difference in how long your makeup lasts and how natural it appears. Hydrated and smooth skin is the best canvas.
Pitfall 5: Using the wrong tools or techniques
Applying product incorrectly, such as rubbing instead of patting, or using a dirty applicator, can compromise the finish and health of your skin.
* Solution: Invest in a few basic, clean tools like a damp beauty sponge or a precise concealer brush. Learn the correct techniques: patting for blending, dabbing for covering. Also, regularly clean your brushes and sponges to prevent bacterial buildup, which can lead to more breakouts.
By being aware of these common missteps and implementing the corrective solutions, you can significantly enhance the natural appearance of your makeup application. It’s a learning curve, but with conscious effort, you’ll quickly refine your technique and achieve the subtle, confident look you desire.
Maintaining your look throughout the day
Applying makeup effectively is only half the battle; maintaining its fresh appearance throughout the day is equally crucial, especially when aiming for a natural, undetectable finish. Factors like oil production, humidity, and simple wear and tear can compromise your initial flawless application. A few simple habits and touch-up strategies can ensure your skin continues to look its best from morning till night.
Blotting for oil control
Naturally, your skin’s sebaceous glands produce oil (sebum), which can lead to shine, especially in the T-zone (forehead, nose, chin). Excess oil can also break down makeup, causing it to slide or become patchy.
* Blotting papers: These small, absorbent sheets are your best friends for midday touch-ups. Gently press them onto oily areas; they will soak up excess oil without disturbing your makeup. Avoid rubbing, which can smear products.
* Tissue: In a pinch, a clean tissue can also absorb oil by gently pressing it onto shiny areas.
Strategic touch-ups
Resist the urge to reapply a full layer of concealer or foundation over areas that have faded or become oily, as this can lead to a cakey look. Instead, focus on targeted, minimal touch-ups.
* Concealer refresh: If an acne scar or red spot becomes visible again, dab a tiny amount of concealer onto the area. Use your ring finger or a small, clean brush to gently pat and blend, reactivating the existing product and adding a touch more coverage where needed.
* Powder sparingly: If you used setting powder, a very light reapplication on extremely oily areas can help. However, over-powdering can lead to a dull or flat complexion. Use a fluffy brush for the most natural reapplication.
Environmental considerations
Your environment plays a significant role in how well your makeup lasts.
* Humidity: In humid climates, opting for water-resistant or long-wear formulas can be beneficial. Setting sprays (applied after initial makeup application) can also help extend wear.
* Touch avoidance: Consciously try to avoid touching your face throughout the day. Transferring oils and dirt from your hands to your face can break down makeup and potentially lead to new breakouts.
* Phone hygiene: Regularly clean your phone screen, as it can harbor bacteria and oils that transfer to your face during calls, contributing to breakouts and smudged makeup.
The importance of removal
While not strictly a “maintenance” step during the day, the proper removal of makeup at the end of the day directly impacts the health of your skin and, consequently, how well future makeup applications will look.
* Always use a dedicated makeup remover or a double-cleansing method (oil cleanser followed by a water-based cleanser) to ensure all traces of makeup, sunscreen, and impurities are lifted.
* This prevents clogged pores, breakouts, and allows your skin to breathe and repair overnight.
Maintaining your makeup throughout the day is about smart, subtle interventions rather than wholesale reapplication. With a few key products and mindful habits, you can ensure your refined look stays consistent, boosting your confidence without drawing attention to the fact that you’re wearing makeup. It’s about a seamless and polished appearance from start to finish.
Beyond makeup: Skincare for lasting results
While makeup offers an immediate solution for covering acne scars and redness, it’s crucial to understand that it’s a temporary fix. For lasting improvement in skin health and appearance, a dedicated and effective skincare routine is paramount. Skincare addresses the root causes of these concerns, reduces their severity over time, and ultimately lessens your reliance on makeup. It’s an investment in your skin’s future.
Addressing acne and inflammation
To minimize future acne scars and redness, preventing breakouts is key.
* Regular cleansing: Wash your face twice daily with a gentle, non-stripping cleanser. This removes excess oil, dirt, and bacteria that can lead to clogged pores.
* Exfoliation: Incorporate chemical exfoliants like salicylic acid (BHA) or glycolic acid (AHA) a few times a week. Salicylic acid is particularly effective for acne-prone skin as it penetrates oil and unclogs pores. Glycolic acid helps with surface texture and hyperpigmentation.
* Topical treatments: For active acne, consider over-the-counter treatments with benzoyl peroxide or retinoids (like adapalene). These ingredients fight acne-causing bacteria and promote cell turnover.
Fading hyperpigmentation and scars
Once acne has subsided, focus on reducing the appearance of post-inflammatory hyperpigmentation (dark spots) and improving skin texture.
* Vitamin C: A powerful antioxidant, Vitamin C helps to brighten skin, even out tone, and fade dark spots. Incorporate a Vitamin C serum into your morning routine.
* Niacinamide (Vitamin B3): This versatile ingredient helps to reduce inflammation, improve skin barrier function, and can also aid in fading hyperpigmentation and reducing redness.
* Sun protection: Daily use of broad-spectrum sunscreen (SPF 30 or higher) is non-negotiable. UV exposure darkens existing hyperpigmentation and can worsen redness, making scars more persistent.
Soothing redness and sensitivity
For general facial redness or sensitive skin, focus on calming and strengthening the skin barrier.
* Gentle products: Avoid harsh cleansers, abrasive scrubs, and products with strong fragrances or alcohol, which can irritate the skin.
* Hydration: A healthy skin barrier is crucial for reducing sensitivity and redness. Use a rich, barrier-repairing moisturizer, possibly containing ceramides or hyaluronic acid.
* Soothing ingredients: Look for ingredients like aloe vera, centella asiatica (cica), green tea extract, or chamomile, known for their anti-inflammatory and calming properties.
Professional treatments
For persistent or severe acne scars and redness that topical products can’t fully address, consult a dermatologist.
* Chemical peels: Can help with hyperpigmentation and mild textural scars.
* Laser therapy: Effective for significant redness (e.g., rosacea, broken capillaries) and various types of acne scars.
* Microneedling or subcision: Treatments for textural acne scars that stimulate collagen production.
Integrating a consistent and targeted skincare routine alongside your makeup practices will yield the most profound and lasting improvements in your skin. By addressing underlying issues, you’ll feel more confident in your natural skin, making makeup a choice for enhancement rather than a necessity for concealment. It’s about cultivating long-term skin health and resilience.
Final thoughts on confidence and natural enhancement
Embracing the use of makeup, even in its simplest forms, to address concerns like acne scars and redness, represents more than just a cosmetic choice for men; it’s a powerful step towards personal confidence and self-assurance. For too long, makeup has been narrowly stereotyped, but its true purpose—to enhance, to subtly correct, and to boost one’s self-image—is universally applicable. This beginner’s guide is not about conformity or altering your identity; it is about providing you with effective tools to present your best self to the world, authentically and comfortably.
The journey begins with recognizing that wishing for clearer skin is a common human desire, and that modern grooming offers accessible, discreet solutions. The techniques outlined here are designed for natural enhancement, ensuring that you look like a refined version of yourself, rather than obviously “made-up.” The beauty of this approach lies in its subtlety; most people won’t even realize you’re wearing makeup, only that your skin looks remarkably good. It is about fostering a sense of control over your appearance and, by extension, your confidence.
Remember, practice makes perfect. Your first few applications might not be flawless, and that’s perfectly normal. Experiment with products, find the tools that work best for your hands, and observe your skin in various lighting conditions. Gradually, you will develop a routine that feels intuitive and efficient. This process is about learning what makes you comfortable and how to achieve the look that makes you feel most confident.
Moreover, the emphasis on quality skincare as a foundational element reinforces the message that makeup should complement, not replace, healthy skin practices. By addressing underlying issues, you create a better canvas for makeup, and perhaps, over time, even reduce your need for it. This holistic approach ensures long-term skin health alongside immediate cosmetic benefits. Ultimately, whether you choose to use makeup daily, occasionally, or not at all, the power lies in having the knowledge and the choice. This guide empowers you to make informed decisions about your grooming, leading to a more positive self-perception and a heightened sense of confidence in all aspects of your life. It’s a testament to personal choice and modern self-care.
| Key Point | Brief Description |
|---|---|
| 🎨 Product Essentials | Focus on concealer, color corrector (green for redness, peach for dark spots), and optional tinted moisturizer for natural coverage. |
| prepping your skin | Cleanse, moisturize, and optionally prime your skin to create a smooth, even base for seamless makeup application. |
| ✨ Application Technique | Use light layers, blend meticulously with fingers or a damp sponge, and always opt for less product initially. |
| 🧴 Skincare Priority | Complement makeup with a consistent skincare routine to address acne, fade scars, and promote overall skin health for lasting results. |
Frequently asked questions
No, when applied correctly with a focus on natural enhancement, men’s makeup should be virtually undetectable. The key is to use minimal product, ensure a perfect shade match, and blend meticulously so the makeup seamlessly integrates with your skin, addressing concerns without drawing attention to itself.
Concealer is a thicker, more pigmented product designed for targeted coverage of specific blemishes like acne scars or spots. Foundation, or tinted moisturizer, is lighter and used to even out the overall skin tone, providing a more uniform base across the entire face.
To find the perfect concealer shade, test it directly on your jawline or a problematic area in natural daylight. The correct shade should visually disappear into your skin, matching both your skin tone and undertone (warm, cool, or neutral) for seamless, undetectable coverage.
Makeup can exacerbate breakouts if you use non-comedogenic products, don’t cleanse properly, or use dirty applicators. Opt for “non-comedogenic” or “oil-free” formulas that won’t clog pores, always remove makeup before bed, and regularly clean your brushes to prevent bacteria buildup.
Skincare is extremely important as it creates the best canvas for makeup, improving its appearance and longevity. A consistent routine to address acne and redness will also reduce your long-term reliance on makeup, promoting healthier, clearer skin from within.
Conclusion
The realm of men’s grooming is continually expanding, and with it comes a more nuanced understanding of personal care that extends beyond traditional boundaries. Embracing makeup for specific concerns like acne scars and redness is not merely a superficial act; it is an intelligent choice for self-enhancement, a tool for bolstering confidence, and a testament to evolving masculinity. By adopting a minimalist approach, focusing on natural products, and prioritizing meticulous application and removal, men can achieve a refined, even-toned complexion that truly looks like their best natural skin. This journey is about empowerment, allowing you to present your most confident self to the world, effortlessly and authentically, without compromising your identity.


